
To prepare walls for painting, start by cleaning them thoroughly with a damp cloth or mild detergent to remove dust, dirt, and grease, ensuring better paint adhesion. Next, sand rough patches and imperfections with fine-grit sandpaper, then wipe away the dust. Apply a suitable primer over glossy or patched areas for an even finish. Finally, inspect and repair any cracks or holes with putty, sanding smooth once dry. Keep going to discover more expert tips for a professional-looking paint job.
Key Takeaways
- Thoroughly clean walls to remove dust, dirt, and grease for better paint adhesion.
- Sand surface imperfections with fine-grit sandpaper for a smooth, even finish.
- Apply a suitable primer to improve paint coverage and adhesion, especially over glossy or repaired areas.
- Repair cracks, holes, and dents with putty or spackle, then sand smooth before painting.
- Use professional tools and take your time with preparation to ensure a durable, professional-looking paint job.
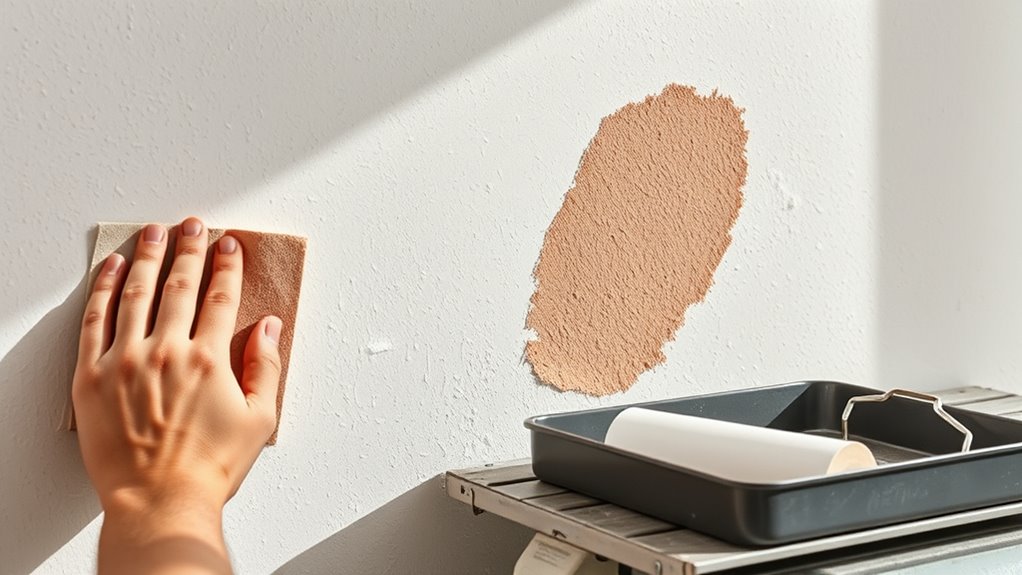
Before you start painting, preparing your walls properly is essential. The key to achieving a smooth, long-lasting finish begins with proper surface preparation. One of the first steps is to guarantee the walls are clean and free from dust, dirt, and grease. Use a damp cloth or mild detergent to wipe down the surfaces and let them dry thoroughly. Once clean, you’ll want to focus on surface sanding. Sanding helps to smooth out imperfections, such as bumps, rough patches, or peeling paint, creating an even surface that will accept paint uniformly. Use a fine-grit sandpaper and gently sand the walls, paying attention to any rough areas or peeling sections. After sanding, wipe away the dust with a damp cloth or tack cloth to prevent particles from sticking to the paint later.
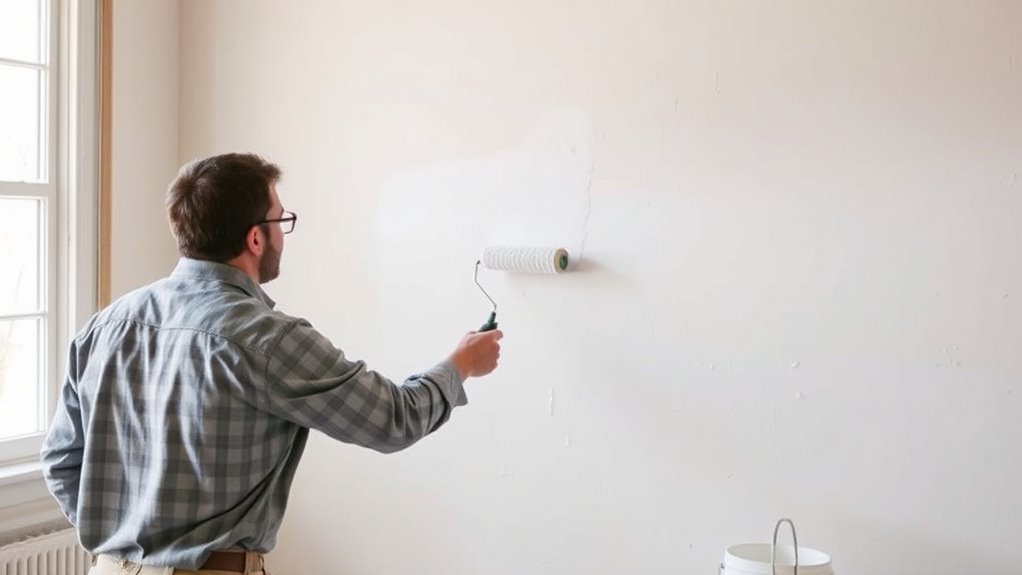
Next, focus on primer application. Applying a suitable primer is vital, especially if you’re painting over a glossy finish, repairing patches, or switching to a different color. Primer provides a better bond for the paint, enhances coverage, and can seal stains or odors that might bleed through your new coat. When applying primer, use a high-quality brush or roller, and work in even, overlapping strokes. Be sure to cover all areas evenly without drenching the surface. Allow the primer to dry completely as per the manufacturer’s instructions before proceeding to paint. Proper primer application not only improves the look but also extends the durability of your paint job. If you notice any areas where the primer appears uneven or patchy, lightly sand those spots once dry, then wipe away the dust before applying paint.
In addition to primer application and surface sanding, inspect the walls for any cracks, holes, or dents. Fill these imperfections with putty or spackle, then sand smooth once dried. This step ensures a flawless finish and prevents any blemishes from showing through the paint. Avoid rushing through these steps; taking the time to prepare your walls thoroughly will save you from frustration later. Remember, the better your surface prep, the easier it is to achieve a professional-looking result. When all these steps are complete—cleaning, sanding, priming, and repairing—you’ll be well on your way to a beautiful, smooth, and durable paint finish that lasts. Proper preparation might take some extra time, but it’s well worth the effort for the stunning results you’ll enjoy. Additionally, using professional tools can help achieve a more precise and even application, making your project easier and more efficient.

Zinsser 02774 PERMA-WHITE Mold & Mildew Proof Interior Paint, Quart, Eggshell White
Self-Priming formula – requires no sanding
As an affiliate, we earn on qualifying purchases.
As an affiliate, we earn on qualifying purchases.
Frequently Asked Questions
How Do I Fix Uneven Wall Surfaces Before Painting?
To fix uneven wall surfaces before painting, start by inspecting the wall closely. Use wall sanding to smooth out high spots and remove rough patches. Apply a joint compound to fill in low areas or dents, then sand again for surface smoothing. Repeat as needed until the wall feels even and smooth to the touch. Proper wall sanding guarantees a flawless finish and helps your paint job look professional.
What Is the Best Primer for Different Wall Types?
Imagine your walls as blank canvases waiting for the perfect touch. When it comes to primer selection, choose one suited for your wall type—latex-based for drywall, oil-based for metal or glossy surfaces, and bonding primers for problematic areas. Proper wall preparation guarantees the primer adheres well, creating a smooth foundation. This step guarantees your paint job looks flawless, vibrant, and long-lasting, transforming your space with minimal effort.
How Long Should I Wait After Patching Before Painting?
You should wait at least 24 hours after patching before painting. This drying time allows the filler to fully cure, preventing cracks or peeling later. Before painting, inspect the surface for any moisture or imperfections. If it feels dry and smooth, you’re good to go. Rushing the process can compromise the finish, so take the time to make sure your patched areas are thoroughly dry and properly prepared for a flawless paint job.
Do I Need to Remove Old Paint Completely?
Ever noticed how old paint sometimes peels or cracks, making you wonder if you should remove it completely? You generally do need to remove loose or peeling paint through paint removal and then sand the wall to create a smooth surface. Skipping this step can cause your new paint to bubble or peel later. So, take the time to strip and sand for a flawless, long-lasting finish.
How Can I Prevent Paint From Peeling Later?
To prevent paint from peeling later, focus on proper wall preparation and ensuring good paint adhesion. Clean the surface thoroughly, remove any loose paint, and repair cracks or holes. Sand the walls to create a smooth surface and apply a primer suited for your wall type. These steps help the paint bond better, minimizing peeling and extending the life of your paint job.

3M Drywall Sanding Sponge, Fine/Medium Grits, Dual Grit Block, Medium Grit to Remove, Fine Grit to Smooth, Ideal for Sanding and Smoothing of Joint Compounds, 2-5/8 in x 3-3/4 in (9095DC-NA)
IDEAL FOR MODERATE SANDING AND SMOOTHING of joint compounds
As an affiliate, we earn on qualifying purchases.
As an affiliate, we earn on qualifying purchases.
Conclusion
Properly preparing your walls can make all the difference in achieving a flawless paint job. Skipping steps might save time upfront, but it often leads to uneven coverage or peeling later on. Did you know that well-prepared surfaces can extend the lifespan of your paint by up to 50%? Taking the time to clean, sand, and prime guarantees your walls look great and last longer, saving you time and money in the long run.

DAP DryDex Dry Time Indicator Spackling, Pink/White, 32 Oz (7079812330)
DryDex is a latex polymer spackle for repairing interior or exterior surfaces like drywall, plaster, wood, brick and…
As an affiliate, we earn on qualifying purchases.
As an affiliate, we earn on qualifying purchases.

3M Easy Trap Sweep and Dust Sheets, 1 Roll of 60 8" x 6" Sheets, Disposable Easy Sweep Floor Duster, Picks Up 8x More Dirt, Dust, Sand, Hair, Works on Dry or Wet Surfaces, Hardwood Floors, 59152W
TRAPS UP TO 8 TIMES MORE DIRT: Patented technology traps up to 8X more dirt, dust and sand…
As an affiliate, we earn on qualifying purchases.
As an affiliate, we earn on qualifying purchases.