To craft DIY bath bombs as personalized spa gifts, gather high-quality ingredients like baking soda, citric acid, and natural dyes, then choose your favorite scents and add-ins. Mix the dry ingredients until smooth, gradually add wet components to achieve a crumbly but cohesive texture, and press the mixture into molds for unique shapes. Once dried, you can personalize with decorative touches and elegant packaging—if you keep exploring, you’ll discover more tips to make your gifts truly special.
Key Takeaways
- Use high-quality ingredients and essential oils to create personalized scents that suit the recipient’s preferences.
- Incorporate decorative elements like dried flowers or charms for a unique, customized touch.
- Choose elegant packaging and labels that reflect the recipient’s style for a polished, gift-ready presentation.
- Experiment with colors and themes to match specific occasions or moods, enhancing the personalized experience.
- Ensure proper drying and handling to produce durable, professional-looking bath bombs that preserve their fizz and appearance.
Gathering Supplies and Ingredients for Your Bath Bombs
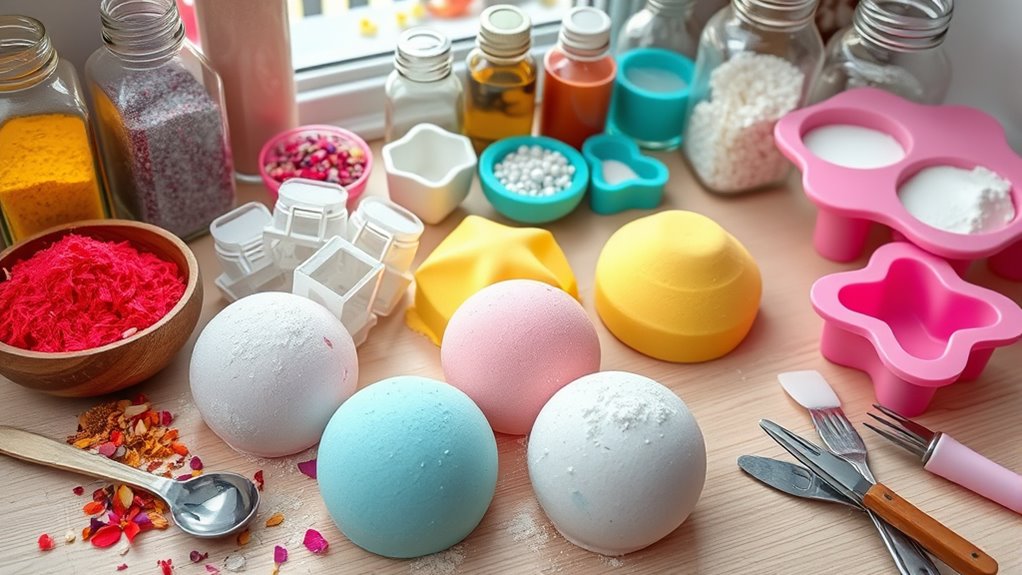
Before you begin making bath bombs, it’s important to gather all the necessary supplies and ingredients. Start with basic items like baking soda, citric acid, Epsom salts, and cornstarch. For scent, choose your essential oil choices carefully—lavender, peppermint, or eucalyptus are popular options, but pick what suits your mood or recipient. When it comes to dye color options, opt for cosmetic-grade dyes or mica powders to ensure safety and vibrant results. Prepare your molds and mixing bowls as well. Having everything ready beforehand streamlines the process and prevents interruptions. Remember, quality ingredients lead to better bath bombs, so don’t skimp on essentials. Using professional equipment can also improve your results and ensure consistency. Incorporating safe and effective dyes is crucial for vibrant, non-toxic colors. Additionally, understanding the bedroom decor trends can inspire personalized touches in your gift, making it even more special. Being aware of common heat pump failures can help you troubleshoot if your equipment ever encounters issues. With your supplies assembled, you’re ready to craft personalized, relaxing bath bombs perfect for gifting or self-indulgence.
Choosing Scents, Colors, and Add-ins for a Personalized Touch
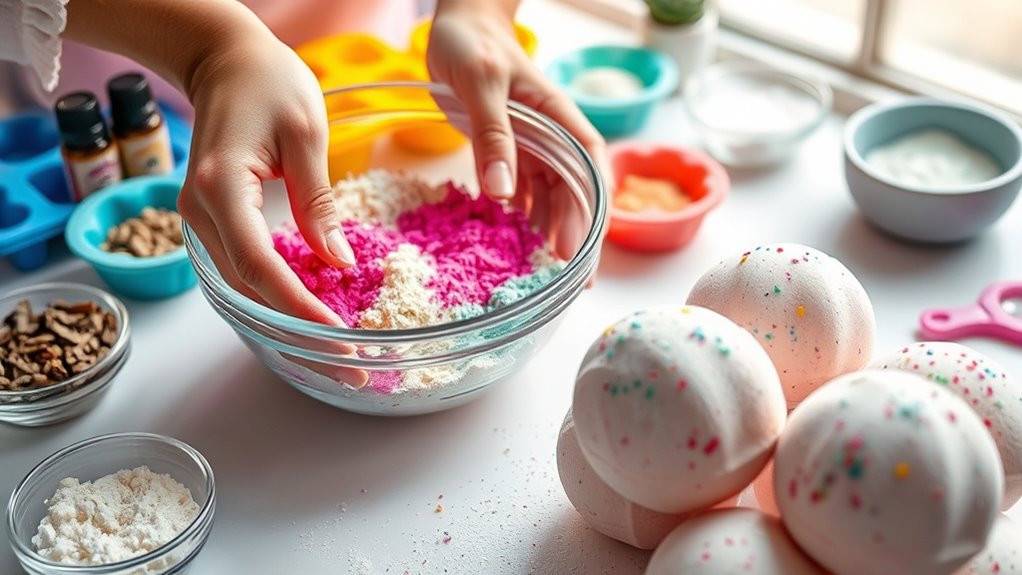
Adding personalized scents, colors, and add-ins can transform simple bath bombs into a truly indulgent experience. Start by choosing essential oils that match the recipient’s preferences or mood—lavender for relaxation, peppermint for invigoration. For colors, opt for natural dyes like beetroot powder or spirulina to create vibrant, chemical-free hues. You can also add extras like dried flower petals, oatmeal, or exfoliating salts to enhance the sensory experience. Be mindful of the amount and compatibility of your add-ins to prevent affecting the bath bomb’s integrity. Combining the right scents, colors, and textures allows you to craft unique, thoughtful gifts that elevate bath time into a personalized spa retreat. These choices make your DIY bath bombs more meaningful and enjoyable.
Mixing the Dry Ingredients for the Perfect Base
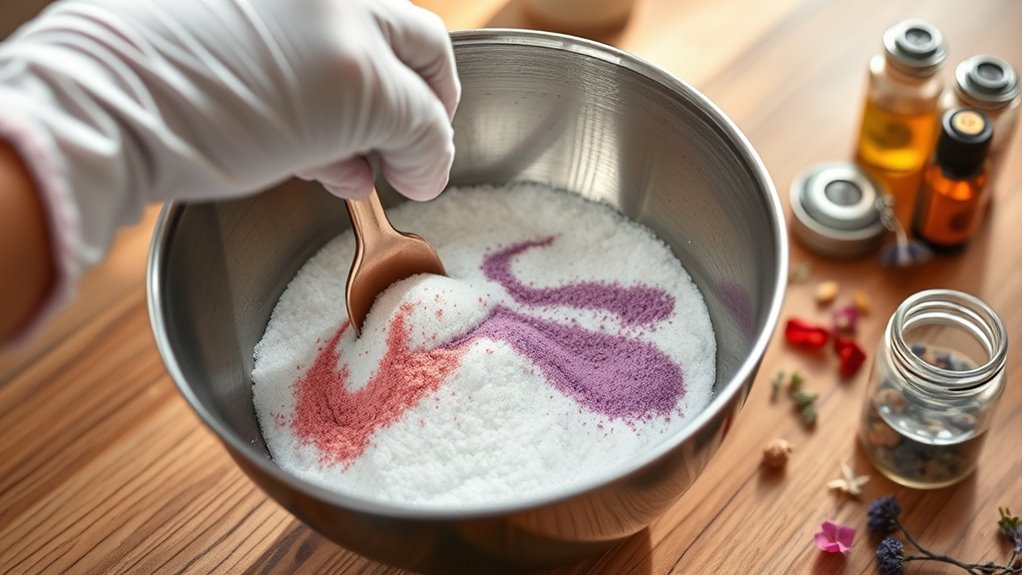
To form a solid foundation for your bath bombs, start by thoroughly mixing the dry ingredients. Combine baking soda, citric acid, Epsom salt, and cornstarch in a large bowl. Use a whisk to evenly distribute the powders, ensuring consistent color combinations and texture. If you prefer ingredient substitutes, such as arrowroot powder instead of cornstarch, mix them in now. Keep in mind that different ingredients may affect the fizzing and skin-softening properties, so choose wisely. The goal is a uniform, powdery mixture free of lumps. To add sophistication, consider how your ingredient choices impact the final product’s appearance and feel. Additionally, incorporating market growth projections can inspire you to explore innovative ingredients and techniques. Being aware of essential oils’ benefits can also help you customize your bath bombs for specific effects or aromatherapy purposes. Exploring ingredient interactions can further refine your formulation for optimal fizz and skin benefits. Incorporating proper mixing techniques can improve consistency and overall quality of your bath bombs. Below is a quick reference:
| Ingredient | Substitutes/Notes |
|---|---|
| Baking Soda | None recommended |
| Citric Acid | Lemon juice powder as alternative |
| Epsom Salt | Dead Sea salt for extra luxury |
Incorporating Wet Components and Achieving the Right Consistency
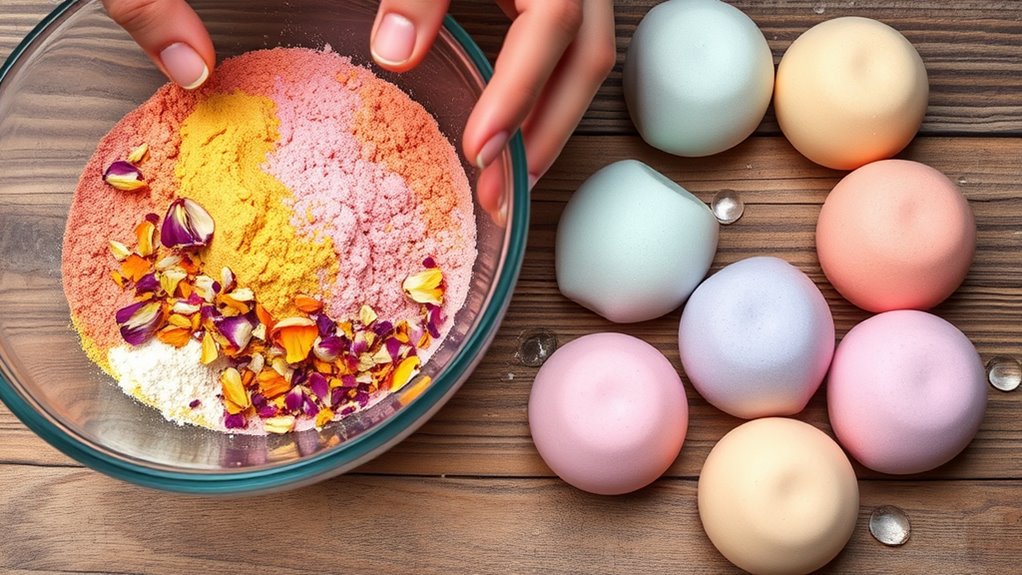
Once you’ve mixed your dry ingredients, it’s time to incorporate the wet components to help the mixture hold together. To control dampness and achieve the right ingredient consistency, add your liquids gradually. You want enough moisture for cohesion but not so much that the mixture becomes overly damp.
Imagine the mixture as a crumbly sandcastle slowly binding together, just holding its shape. You might see:
- Tiny droplets of water or witch hazel glistening on the surface
- The mixture turning slightly sticky as it begins to clump
- The texture becoming firm yet pliable, ready for shaping
Keep a close eye on dampness control, adjusting your liquids as needed. Proper moisture balance is essential to prevent the mixture from becoming too wet, which could cause issues during shaping and drying. Maintaining the right moisture level helps ensure the bath bombs hold their shape and fizz properly in water.
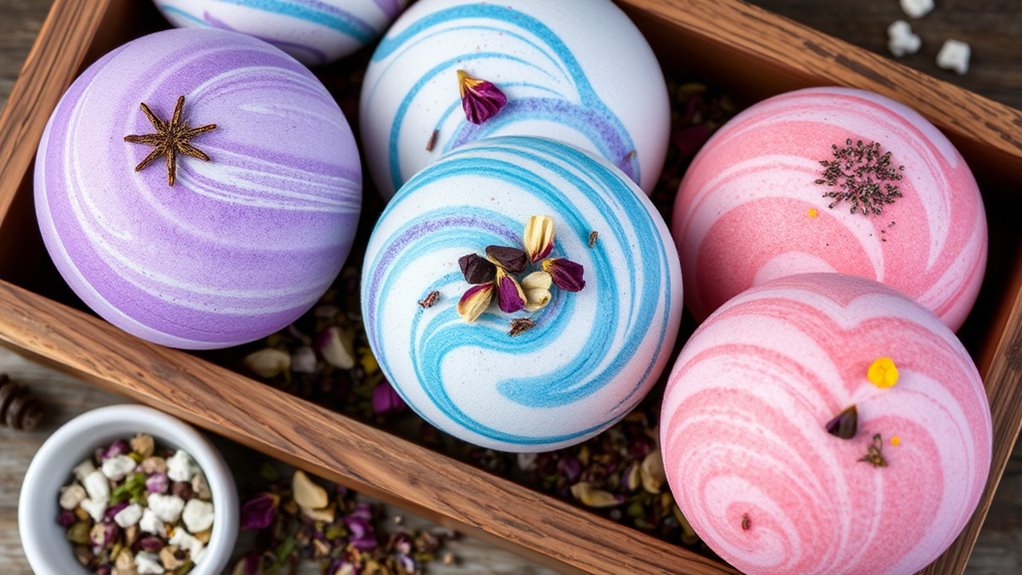
Shaping and Molding Your Bath Bombs for Unique Designs
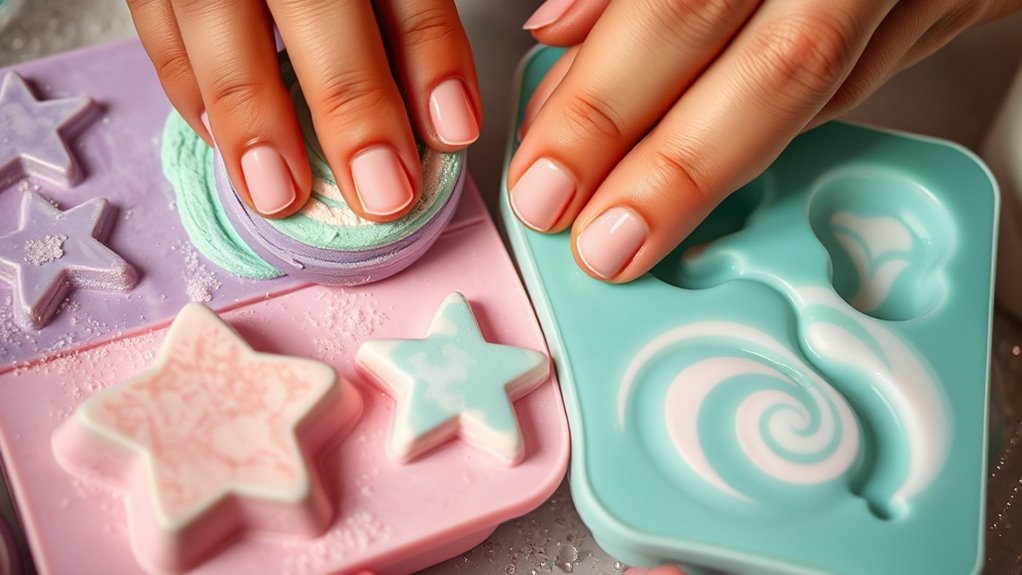
After your mixture reaches the right consistency, you can start shaping and molding your bath bombs into creative designs. Choose mold materials like plastic, silicone, or metal based on the detail and ease of release you want. Silicone molds are flexible and perfect for intricate designs, while plastic molds are sturdy for simple shapes. To create unique patterns, use design templates or freehand your own ideas. Fill each mold evenly, pressing firmly to pack the mixture tightly. For layered or detailed designs, consider using multiple molds or sections. Once filled, gently tap out any excess mixture and press the molds together if needed. This process allows you to craft personalized, visually appealing bath bombs that elevate your gift-giving. Additionally, understanding the candy sugar content can help you choose ingredients that won’t cause unwanted reactions during the molding process. Being aware of the mindset principles from Abraham’s success strategies can also help you stay patient and positive as you perfect your craft. Moreover, paying attention to cultural preferences can inspire you to incorporate themes or colors that resonate with different celebrations or personal tastes. Incorporating merchant services into your craft business can streamline your sales process and help you reach a wider audience. It is also helpful to research popular design trends to keep your creations fresh and appealing to customers.
Allowing Your Bath Bombs to Dry and Harden Properly

Allowing your bath bombs to dry and harden properly is vital for achieving the perfect fizz and shape. Proper air circulation helps remove excess moisture, preventing crumbling or soft spots. Controlling humidity is also essential; high humidity can cause uneven drying or premature fizzing. To guarantee optimal drying, place your bath bombs in a well-ventilated area with steady airflow. Keep them on a flat surface, away from direct sunlight or heat sources. Consider using a breathable container or covering them loosely with a cloth to protect from dust while maintaining airflow. During this time, you’ll see the bath bombs firm up, develop a smooth surface, and become less fragile. Adequate drying conditions also help preserve the natural ingredients in your bath bombs. Good drying techniques can prevent mold growth and ensure your bath bombs stay fresh longer. Maintaining ideal drying conditions is crucial for a professional finish and long-lasting gifts. Patience here guarantees beautiful, long-lasting gifts that fizz perfectly in the bath.
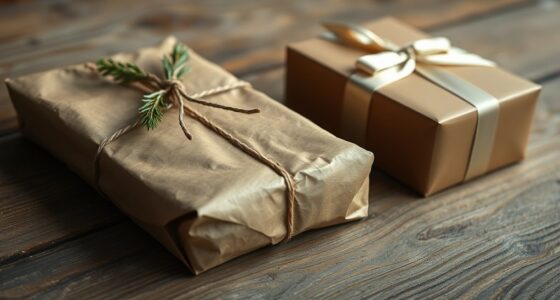
Packaging Ideas to Enhance Your Handmade Spa Gifts

Creative packaging can elevate your handmade spa gifts and make them feel even more special. Using decorative ribbons adds a touch of elegance, while minimalist wraps keep the presentation sleek and modern. Consider choosing natural kraft paper or tissue paper to complement the bath bombs’ colors and scents. You can enhance their appeal with a simple tag or personalized note. Here’s a quick guide:
| Packaging Options | Materials | Tips |
|---|---|---|
| Decorative Ribbons | Satin, burlap, or velvet ribbons | Tie in bows for a polished look |
| Minimalist Wraps | Kraft paper, tissue paper | Keep it simple, with neutral tones |
| Small Bags or Boxes | Clear cellophane, cardboard | Showcase your bath bombs while protecting them |
This approach makes your gifts thoughtful and visually appealing. For a professional touch, consider exploring product presentation techniques to further enhance your packaging, which can also reflect your personal style and self-awareness in your gift-giving approach. Additionally, incorporating brand consistency can make your handmade gifts appear more cohesive and memorable.
Customizing Scents and Decorations for Special Occasions

You can create bath bombs that match the mood of any occasion by customizing scents and decorations. Mix personalized fragrance blends to evoke specific feelings or themes, making each bath a special experience. Add themed decorative elements to enhance the visual appeal and make your gifts truly memorable. Incorporating personalized gift ideas can further elevate the uniqueness of your creations.
Personalized Fragrance Blends
Have you ever wondered how to make your bath bombs truly special for any occasion? Creating personalized fragrance blends is a great way to do that. Start by experimenting with essential oil combinations that evoke specific moods or memories. Use color theory to match scents with colors—calming lavender with soft purple, invigorating citrus with bright yellow, or romantic rose with gentle pink. To visualize your blend, imagine:
- A soothing lavender and chamomile scent paired with pastel purple hues
- A zesty orange and peppermint mix accented by vibrant orange and white
- A calming eucalyptus and spearmint combination with cool green tones
These combinations help craft a sensory experience tailored to the recipient or event, making your bath bombs not just relaxing, but also beautifully personalized through carefully chosen scents and colors.
Themed Decorative Elements
Adding themed decorative elements transforms simple bath bombs into personalized treats perfect for any celebration. You can customize scents and decorations to match seasonal motifs or holiday embellishments, making your gifts truly special. Use dried flower petals, glitter, or mica powders to add sparkle and color, and incorporate small charms or stickers for extra flair. To help you decide, here’s a quick guide:
| Occasion | Decorative Elements |
|---|---|
| Winter Holidays | Cinnamon sticks, pinecones, snowflake charms |
| Valentine’s Day | Red/pink mica, heart-shaped embeds |
| Halloween | Orange/black colors, spooky stickers |
| Spring/Summer | Floral accents, fresh herbs, bright colors |
| Birthdays | Custom toppers, vibrant sprinkles |
Mix and match these to craft bath bombs that celebrate any event in style.
Tips for Troubleshooting Common Bath Bomb-Making Issues
When bath bombs don’t fizz properly or crumble easily, it often indicates an imbalance in the mixture or incorrect handling during molding. Common mistakes include adding too much liquid, overpacking the mold, or not letting the bombs dry long enough. To troubleshoot, keep these tips in mind:
- Ensure your mixture is moist but not wet, resembling damp sand.
- Press the mixture firmly into molds without overpacking.
- Allow bath bombs to dry in a cool, dry place for at least 24 hours.
Picture pressing the mixture gently into the mold, avoiding excess pressure that causes crumbling, and then patiently waiting as they set. These troubleshooting tips help you create perfectly fizzing, sturdy bath bombs every time.
Creative Ways to Present Your Personalized Spa Gifts
You can make your spa gifts stand out with elegant packaging ideas that add a touch of sophistication. Themed gift sets create a fun, cohesive presentation, making your gifts feel extra special. Personal touch labels let you customize each gift, adding a heartfelt element that truly resonates.
Elegant Packaging Ideas
Ever wondered how to make your personalized bath bombs stand out as luxurious gifts? Elegant packaging elevates your thoughtful creations. Consider using clear cellophane wraps tied with silk ribbons to showcase the bath bomb’s beauty. Incorporate unique containers like vintage jars or eco-friendly boxes with custom inserts. Play with scent combinations and color palettes by adding decorative touches—think scented dried flower petals or metallic accents—that complement your bath bombs. To create a stunning presentation, you might include:
- Beautifully designed gift tags with personalized messages
- Decorative tissue papers matching your color palettes
- Small wooden crates or woven baskets for a rustic charm
These ideas make your spa gifts memorable, reflecting the care and creativity you put into each one.
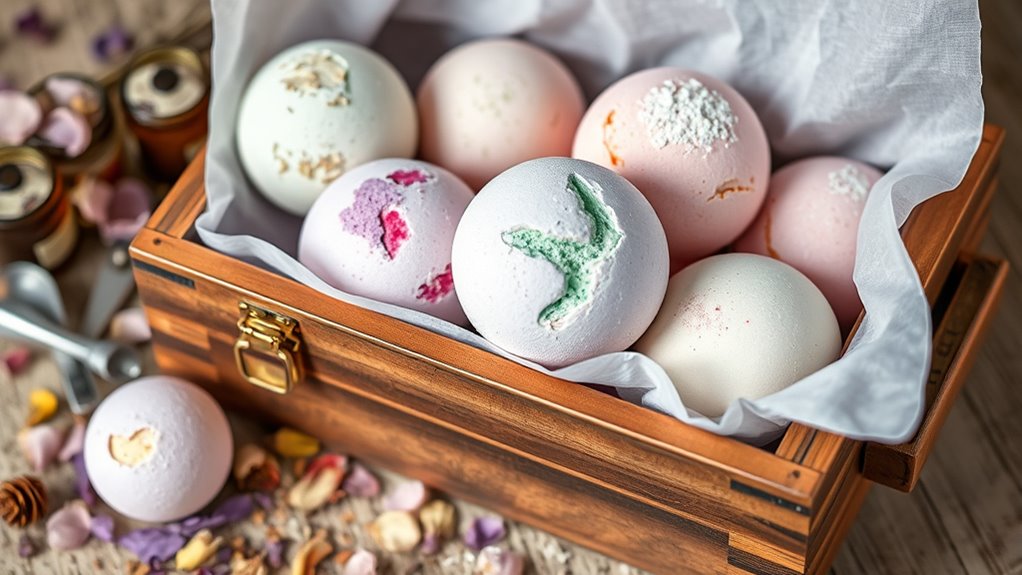
Themed Gift Sets
Building on elegant packaging ideas, creating themed gift sets transforms your personalized spa gifts into memorable and cohesive presents. Incorporate luxury ingredients like essential oils, dried flowers, or nourishing butters to elevate the experience. Pair these with eco-friendly packaging, such as biodegradable boxes, cloth wraps, or reusable jars, to showcase your commitment to sustainability. You can design sets around specific themes, like a “Relaxation Retreat” with calming scents or a “Spa Night” kit with candles and plush towels. Arranging your bath bombs alongside complementary items enhances the overall appeal and makes the gift more thoughtful. Thoughtful presentation, combined with high-quality ingredients and eco-conscious packaging, turns simple DIY bath bombs into luxurious, personalized spa gifts that impress.
Personal Touch Labels
Personal touch labels are a simple yet impactful way to elevate your personalized spa gifts. They add a professional look and make your gifts feel more special. When designing your label, focus on clean label design and choose a font selection that reflects the spa’s calming vibe. To help visualize, consider these options:
- Elegant script fonts for a luxurious feel
- Clear, minimalist labels with soft pastel colors
- Playful handwritten styles for a fun touch
Use high-quality paper or waterproof labels to guarantee durability. Be mindful of font size—too small can be hard to read, too large can look overwhelming. Personalized labels turn simple bath bombs into memorable, thoughtful gifts that truly stand out.
Frequently Asked Questions
How Long Do Homemade Bath Bombs Typically Last Before Losing Their Fizz?
Homemade bath bombs generally last about 4 to 6 months before losing their fizz, but this depends on storage. To maximize shelf life, keep them in an airtight container in a cool, dry place away from humidity and direct sunlight. Proper storage tips help preserve their effervescence and scent, ensuring your DIY spa gifts stay fresh and bubbly longer. Always check for signs of moisture or mold before use.
Can I Make Bath Bombs Suitable for Sensitive Skin or Allergies?
Ever wondered if you can make bath bombs safe for sensitive skin or allergies? You definitely can! Use hypoallergenic ingredients and opt for fragrance-free options to minimize irritation. By choosing gentle oils, natural colorants, and avoiding common allergens, you create soothing, personalized spa gifts. Wouldn’t your loved ones appreciate a thoughtful, skin-friendly bath bomb tailored to their needs? Yes, you can craft gentle, allergy-conscious bath bombs easily at home.
What Are Eco-Friendly Alternatives to Traditional Bath Bomb Packaging?
You can choose eco-friendly packaging options for your bath bombs by using biodegradable wrapping, which breaks down naturally and reduces environmental impact. Reusable containers, like glass jars or metal tins, are also great alternatives that customers can repurpose, minimizing waste. These choices not only showcase your commitment to sustainability but also add a unique, personalized touch to your handmade spa gifts.
How Can I Prevent My Bath Bombs From Cracking or Crumbling?
Think of your bath bombs like fragile eggs—you need gentle handling. To prevent cracking, store them in airtight containers and avoid temperature swings. Use proper storage tips, like wrapping your bombs in tissue paper, to keep them intact. If ingredients like baking soda cause crumbling, try substitutions like citric acid or cornstarch for stability. These simple steps make certain your bath bombs stay perfect until their relaxing debut.
Are There Safe Ways to Add Exfoliants to My DIY Bath Bombs?
You can safely add exfoliants to your DIY bath bombs by choosing natural ingredients like sea salt, sugar, or oatmeal, which are gentle on skin sensitivities. Mix small amounts thoroughly to avoid clumping, and test your recipe first to guarantee it holds together. Always use clean, skin-friendly ingredients, and avoid harsh additives. This way, your bath bombs will offer a soothing, exfoliating experience suitable for sensitive skin.
Conclusion
Now that you’ve mastered the art of bath bomb creation, get ready to wow—or perhaps mildly confuse—your friends with your “personalized spa” gifts. Who knew that mixing, molding, and packaging could be so rewarding? Just remember, nothing says “luxury” like a slightly cracked bomb or a suspiciously vibrant color. So go ahead, craft with confidence, and enjoy the delightful chaos of making your very own spa line—one fizzy explosion at a time.