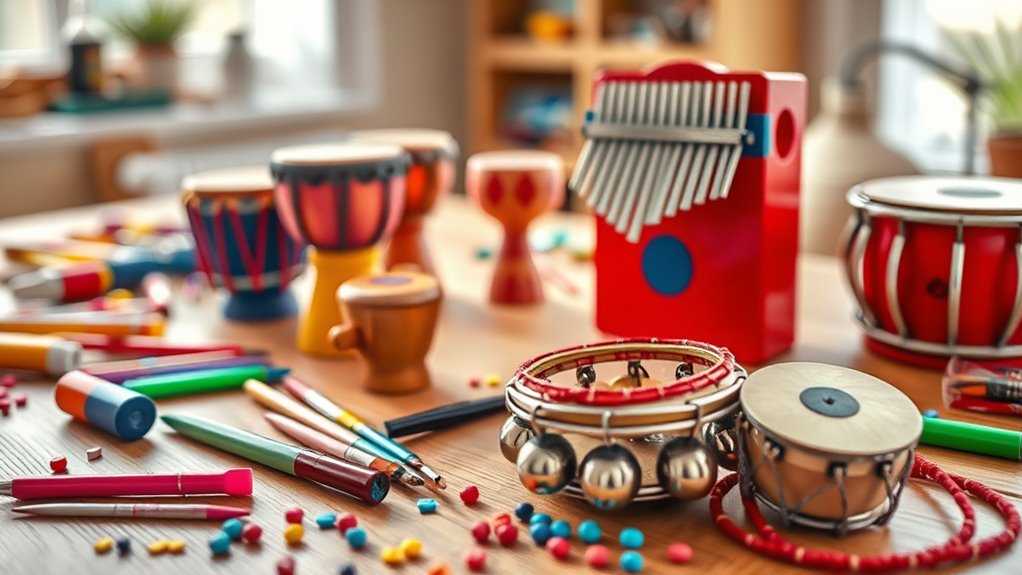

Crafting musical instruments as DIY kids’ gifts is a rewarding way to inspire creativity and teach musical concepts. You can make simple drums from recycled cans, colorful maracas with bottles filled with beans, or a cardboard ukulele with rubber band strings. These projects help kids understand sound, rhythm, and instrument care while allowing personal touches through decorations. Keep exploring, and you’ll discover more fun ideas to keep little musicians engaged and inspired.
Key Takeaways
- Using recyclable household items like cardboard, plastic bottles, and cans to create personalized, eco-friendly musical instruments for kids.
- Incorporating simple craft supplies such as glue, tape, and paint to decorate and customize instruments, enhancing creativity.
- Teaching children basic musical concepts like rhythm, tuning, and sound production through hands-on instrument construction.
- Ensuring safety by supervising craft activities, choosing age-appropriate materials, and securely attaching parts like jingle bells.
- Promoting developmental skills such as fine motor coordination, confidence, and artistic expression via DIY instrument projects.

Hodola 100 Pcs Soccer Plates and Napkins Party Supplies (Serves 25), Soccer Birthday Party Decorations & Disposable Tableware Set for Sports Theme Party, Baby Shower, Soccer Fans
【Soccer Party Supplies (Serves 25)】: This tableware set is designed to host a party for 25 guests. You...
As an affiliate, we earn on qualifying purchases.
Simple Drums From Recycled Materials

Creating simple drums from recycled materials is a fun and eco-friendly way to make musical instruments with kids. When building your drum, teach them about instrument care—how to gently clean and handle their creation to keep it sounding great. Incorporate basic musical theory by encouraging kids to explore different rhythms and beats, helping them understand timing and pattern recognition. Using recycled items like empty cans, cardboard boxes, and rubber bands not only promotes environmental awareness but also sparks creativity. As they play, guide them on how different materials produce varied sounds, deepening their musical understanding. Introducing children to sound quality and how it can be influenced by different materials can enhance their appreciation for music and instrument construction. Additionally, exploring how wicks can affect the resonance and volume of homemade drums can provide further insight into instrument design. Understanding how sound absorption works in different materials can help children grasp why some sounds are muffled or amplified. This hands-on project makes learning about instrument care and musical theory engaging and accessible, inspiring kids to explore music while being environmentally conscious.

QZYL 50 Pack Soccer Paper Food Trays, Sports Birthday Party Decorations for Sport Fans' Carnival, Disposable Food Serving Boats for Soccer Party Supplies, Sport Snack Tray for Game Day Kitchen Favors
Easy to assemble: The pre‑designed fold lines allow you to quickly put together sturdy soccer paper food trays,...
As an affiliate, we earn on qualifying purchases.
Colorful Maracas Using Everyday Items

Making colorful maracas with everyday items is a fun, easy craft that sparks kids’ creativity and musical curiosity. As you create these maracas, you introduce them to basic music theory concepts like rhythm and beat, making learning interactive. Using simple materials like plastic bottles, beans, or rice, you can explore the instrument’s history, which dates back to ancient cultures worldwide. Talk about how maracas have been used in traditional music for centuries, connecting your craft to global musical heritage. Bright colors and varied textures make the maracas visually appealing and engaging. This hands-on activity not only fosters artistic expression but also deepens their understanding of how different instruments contribute to musical compositions. Exploring different instrument types can help children understand the variety of sounds and functions within musical ensembles. Incorporating musical styles during the activity introduces children to diverse cultural traditions and musical expressions. Additionally, discussing the health benefits of musical engagement can inspire them to appreciate music as a positive and enriching activity. It’s a perfect way to combine fun, learning, and cultural appreciation.

3PCS Soccer Party Decorations - Large Soccer & Trophy Foil Balloon Set, Sports/Birthday Themed Party Supplies for Soccer Fans,2026 World Cup Decor
Oversized Impressive Sizes - Set includes 2 giant soccer foil balloons (22inch X 38.5inch) and 1 extra-large trophy...
As an affiliate, we earn on qualifying purchases.
Ukuleles Made From Cardboard and Rubber Bands

Creating a cardboard ukulele is simple and fun, starting with basic materials like cardboard, rubber bands, and glue. I’ll walk you through each step of building it, so your child can easily assemble their own instrument. Once finished, they can personalize and play their unique ukulele, making it a special craft and musical project. Incorporating DIY tuning techniques can help improve the sound quality and make the experience even more rewarding. Paying attention to color accuracy during assembly can also enhance the visual appeal of the finished instrument. Additionally, understanding self-watering plant pots can inspire creative storage solutions for organizing craft supplies used in making musical instruments.
Materials Needed Overview
To craft a simple ukulele from cardboard and rubber bands, you’ll need just a few basic materials. Start with a sturdy piece of cardboard for the body and neck. You’ll also need several rubber bands of different thicknesses to serve as strings, which will help with instrument tuning. A pair of scissors is essential to cut the cardboard into your desired shape. You might want to have a ruler or measuring tape to guarantee accurate placement of the strings. For added stability, consider using glue or tape. To help with musical notation, create simple labels or guides for finger placement. These materials are easy to find and make the project accessible, ensuring fun and learning in your DIY musical adventure. Incorporating DIY musical instruments can also inspire creativity and a love for music in children, especially when designed with a child-friendly approach. Additionally, exploring textile line techniques can introduce new textures and creative possibilities to your craft projects.
Building Step-by-Step Guide
Start by shaping your cardboard into a ukulele body and neck, cutting out a rectangular shape for the body and a narrower strip for the neck. Use your understanding of musical theory to determine the placement of the bridge and fret lines, ensuring proper spacing for sound production. Remember, the instrument’s history shows that simple materials like cardboard can produce surprisingly good sound when tuned correctly with rubber bands acting as strings. Secure the neck to the body with tape or glue, making sure it’s aligned for easy playability. Attach the rubber bands across the body, stretching from the neck to the bottom, to serve as strings. This process not only teaches crafting skills but also offers insight into how traditional instruments evolved from simple designs. Additionally, understanding the mailing list management techniques can help you share your DIY projects more effectively with friends and family.
Playing and Personalizing
Once your cardboard ukulele is assembled and tuned with rubber band strings, you can begin playing and making it uniquely yours. Experiment with different strumming patterns to boost your musical creativity and discover new sounds. Personalizing your ukulele is easy—try decorating the body with drawings, stickers, or colorful tapes to reflect your style. Adjust the tension of the rubber bands to change the pitch, creating a personalized sound that fits your mood. You can also explore emotional intelligence by recognizing how different sounds make you feel, enhancing your self-awareness while creating music. Developing musical skills through practice can help you improve your playing over time. Play familiar tunes or invent your own melodies, gaining confidence as you practice. The more you experiment, the more your instrument becomes an extension of your personality. Remember, the goal is fun and self-expression, so let your creativity lead the way in turning this DIY project into a personalized musical experience. Being aware of emotional manipulation can help you protect your feelings while engaging in creative activities.

LUUJESA 5 Pack World Cup Decorations 2026 - Soccer Snack Serving Tray for Soccer Party Decorations, Soccer Party Supplies for Game Day & Soccer Birthday Party, World Cup Decor for Soccer Fans
Soccer Party Decorations 2026: Designed for Soccer Party Decorations 2026, this soccer serving tray instantly creates an exciting...
As an affiliate, we earn on qualifying purchases.
Tambourines With Jingle Bells and Paper Plates

First, gather your materials: paper plates, jingle bells, glue, and some sturdy craft sticks or markers. Next, assemble the frame by attaching the paper plates together, ensuring they stay secure. Finally, add the jingle bells inside or around the plates to create a lively, musical shake when played. Incorporating essential storytelling elements can make the instrument more engaging for children.
Gathering Materials Needed
To make your homemade tambourines with jingle bells and paper plates, gather all the necessary materials first. Prioritize material safety by choosing non-toxic paints and child-friendly glue. You’ll need paper plates, small jingle bells, craft sticks or plastic spoons, and some sturdy tape or glue. For sourcing alternatives, consider using recycled materials like old cardboard or unused utensils to reduce waste and save costs. Make sure all items are age-appropriate and free of small parts that could pose a choking hazard. Double-check that the jingle bells are securely attached, and select safe adhesives to prevent any accidents. Having everything ready beforehand guarantees a smooth crafting process and keeps your little one safe while creating their musical masterpiece. Additionally, managing noise levels is important to ensure the activity remains enjoyable and safe for children.
Assembling the Frame
Begin by attaching the jingle bells to the inside edge of one paper plate using strong, child-safe glue or tape, guaranteeing they are evenly spaced for a balanced sound. Next, you’ll need to assemble the frame, which is simply the second paper plate. To maintain frame stability, make sure the plates align perfectly. Use a hole punch or a sharp tool for making holes around the edges, then thread a sturdy string or metal fastener through both plates’ holes, tying securely. When selecting your tools, choose ones that are safe and easy for kids to handle, like plastic scissors or a child-friendly hole punch. This ensures the tambourine’s frame remains sturdy and durable, ready for the jingle bells to be added later.
Adding Jingle Bells
Once the frame is assembled and the glue has dried, it’s time to add the jingle bells. Attach them around the edge of the paper plate, spacing them evenly. Use glue or small fasteners to secure each bell firmly in place. As you do this, encourage your child to shake the tambourine gently to hear the jingle bell rhythm. This creates lively, festive sound effects that instantly lift the toy’s appeal. The jingling adds a cheerful layer of sound, making the instrument more interactive and fun to play. Be sure to press the bells securely so they won’t fall off during use. Additionally, choosing lightweight musical instruments ensures safety and ease of handling for children. Using the right materials can also influence the durability and sound quality of the finished tambourine. Incorporating payment processing principles such as selecting quality materials and securing components can enhance the overall durability and value of the toy. Once finished, let the glue dry completely, and then enjoy the delightful jingle sounds your child can produce anytime they shake their new musical instrument.
Water Bottle Shakers for Rhythm Practice
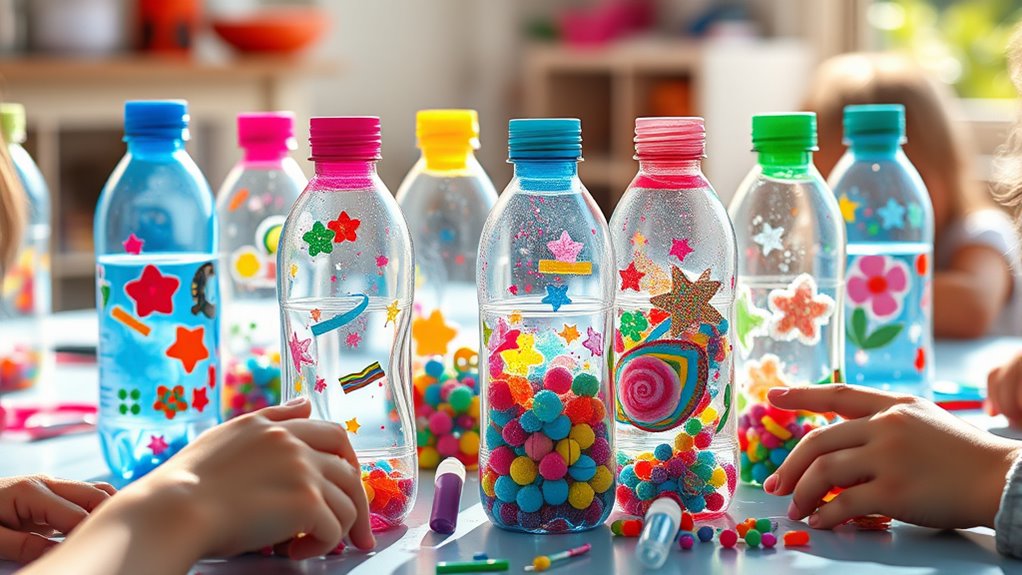
Creating water bottle shakers is a simple and fun way to help kids develop their sense of rhythm. As they shake along to their favorite tunes, they naturally learn about timing and beat, which are essential parts of music theory. These shakers also encourage active listening and coordination. When making them, you can discuss how different amounts of water affect the sound, introducing basic ideas of instrument tuning. Filling the bottles with beads or rice creates a crisp, rhythmic sound that keeps kids engaged. Plus, customizing the bottles with stickers or drawings makes the activity more personal. These shakers are affordable, easy to make, and perfect for practicing rhythm at home or in the classroom. They’re a great DIY gift that combines creativity with musical learning. Incorporating musical instrument tuning concepts can help children understand how different sounds are produced and adjusted, enhancing their overall musical understanding. Additionally, understanding how engine tuning affects sound and performance can serve as a helpful analogy when discussing how water levels influence the pitch of the shakers. Also, exploring the energy efficiency of the materials used can encourage kids to think about sustainable choices in their crafts.
String Instruments With Household Items

Making string instruments at home is a fun and resourceful way to introduce kids to musical craftsmanship using household items. This activity connects to the string instrument history, showing how simple materials can produce complex sounds. You can create a basic guitar from a cardboard box and rubber bands or craft a makeshift violin with a shoebox and hair ties. These projects can lead to exploring advanced string techniques later on. Encourage your kids to experiment with tension and pitch, enhancing their understanding of sound. Use the table below to guide different instrument ideas and techniques:
| Instrument Idea | Technique Focus |
|---|---|
| Rubber band guitar | String tension and pitch |
| Shoebox violin | Bowing and fingering |
| Water bottle ukulele | Chord progression |
| Glass jar kalimba | Plucking and tuning |
| String and straw instrument | Vibrations and resonance |
Additionally, exploring musical instrument design can inspire further creativity and innovation in your projects.
DIY Harmonica With Common Kitchen Supplies

If you’re looking for a simple way to introduce kids to wind instruments, crafting a DIY harmonica with common kitchen supplies is a perfect choice. You only need items like plastic straws, rubber bands, and small containers. To make the harmonica, cut the straws to different lengths, which allows kids to explore musical scales by blowing across each one. This project encourages kids to learn about harmonica maintenance, like keeping the instrument clean and ensuring the rubber bands stay secure. As they experiment with different notes, they’ll develop an understanding of pitch and sound production. This hands-on activity makes learning about wind instruments fun and accessible, helping kids appreciate the basics of musical scales while creating their own unique instrument.
Creative Music Sticks Using Craft Supplies
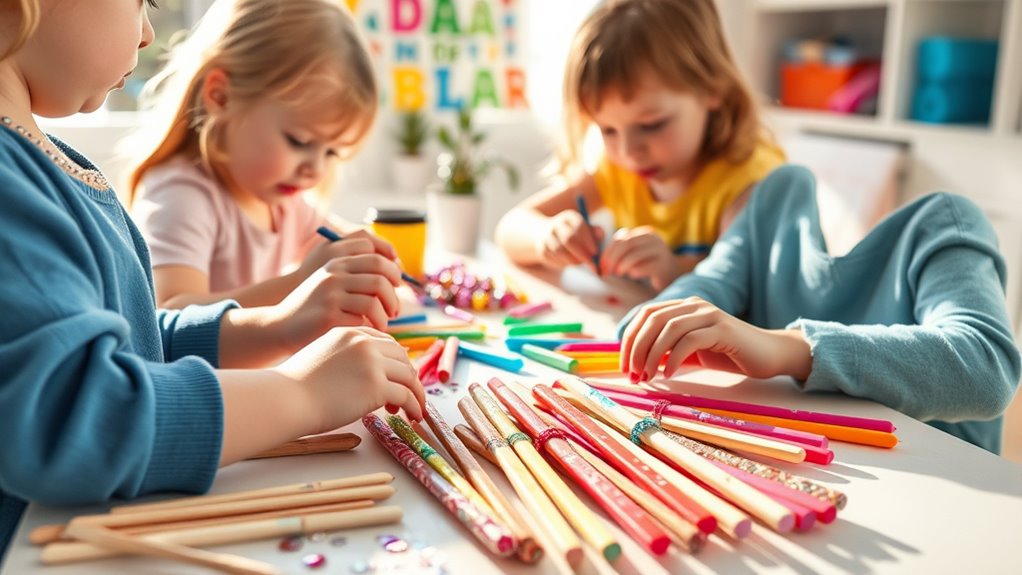
Building on the fun of crafting wind instruments, you can encourage kids to explore rhythm and sound with DIY music sticks. Using craft supplies like wooden dowels, straws, or painted craft sticks, children can create their own percussion instruments. To add an educational touch, introduce musical notation by marking different sounds or rhythms on each stick. As kids experiment, they can learn about instrument tuning by adjusting the way they strike or tap the sticks to produce varied tones. This activity helps develop an understanding of pitch and sound quality while fostering creativity. Plus, it’s a simple, affordable project that combines craftiness with musical discovery, making it a perfect DIY gift for young music enthusiasts.
Frequently Asked Questions
What Safety Precautions Should I Take When Crafting Musical Instruments With Children?
When crafting musical instruments with children, you should prioritize safety by ensuring constant child supervision to prevent accidents. Use non-toxic materials to keep everyone safe, especially since kids might put things in their mouths. Keep sharp tools out of reach and handle them yourself, teaching children about safe tool use. Creating a safe environment helps make the activity fun and educational without risking injury.
How Can I Personalize DIY Instruments to Suit Different Age Groups?
Did you know that personalized toys boost kids’ creativity by 30%? To tailor DIY instruments for different age groups, focus on age-appropriate designs that match their motor skills and interests. Incorporate personalized sound features, like adjustable strings or removable parts, so children can experiment and customize their instruments. This approach makes the experience more engaging and educational, ensuring each child’s unique preferences are reflected in their musical creation.
Are There Environmentally Friendly Materials Recommended for Making These Instruments?
You’re wondering if there are eco-friendly materials for making DIY musical instruments. Absolutely! You should look for biodegradable supplies like bamboo, recycled paper, or natural rubber. These eco-friendly materials are safe for kids and better for the environment. Using biodegradable supplies not only reduces waste but also teaches kids the importance of sustainability. Incorporate these materials into your projects to create fun, safe, and environmentally responsible instruments.
How Long Do These Homemade Instruments Typically Last With Regular Use?
Your homemade instruments can last a surprisingly long time, often years, if you focus on instrument durability and proper maintenance tips. With regular care, such as gentle cleaning and avoiding excessive moisture, they won’t just fall apart overnight. The lifespan depends on materials used and how often kids play with them. By choosing eco-friendly supplies and staying attentive to upkeep, you guarantee your creations remain vibrant, functional, and cherished for ages.
Can These Crafts Be Adapted for Group Activities or Classroom Settings?
You can definitely adapt these musical instrument crafts for group activities or classroom settings. They make great group activity ideas, encouraging teamwork and creativity. To suit classroom craft adaptations, consider using affordable, safe materials and organizing the process into manageable steps. This helps kids stay engaged and learn together. With some planning, your students will enjoy making their own instruments while fostering collaboration and musical exploration.
Conclusion
Now that you’ve got these fun ideas, you’re ready to turn everyday household items into musical treasures. Think of it as opening a treasure chest of creativity, where each craft sparks joy and rhythm. Just imagine your kids’ faces lighting up as they play their homemade instruments, turning ordinary objects into melodies that make memories. So grab your supplies and start creating—because the best music often begins with a simple, heartfelt DIY.